Archive
Implementing Single Sign-On (SSO) using Azure
In this post I am going to show you how you can secure On-Premises or Cloud based web application using Windows Azure Active Directory which provides identity and access management capability in the cloud.And depending on your requirements you may have various On-Premises or Cloud Federation Identity Management scenarios and it is hard to cover all of them,but hopefully this post will give you some insight into the cloud based identity management and may be useful for your projects.
Before we deep dive into it I assume you have some idea of this type of identity management and are familiar with terms like Identity Provider, Relying Party, Windows Identity Foundation, WS-Federation and the orchestration behind such authentication process. If you are new to this topic and need a bit of background then I highly recommend reading the book Programming Windows Identity Foundation.
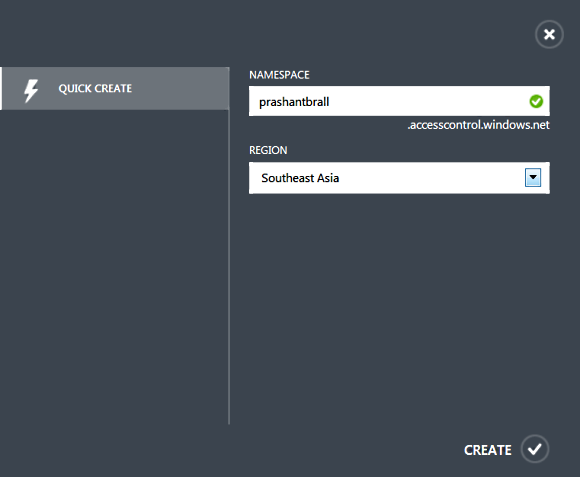
Lets browse to the Azure Management Portal and start configuring Windows Azure Active Directory (WAAD) by clicking New > App Service > Active Directory > Access Control > Quick Create and I am going to create a new namespace as shown below.
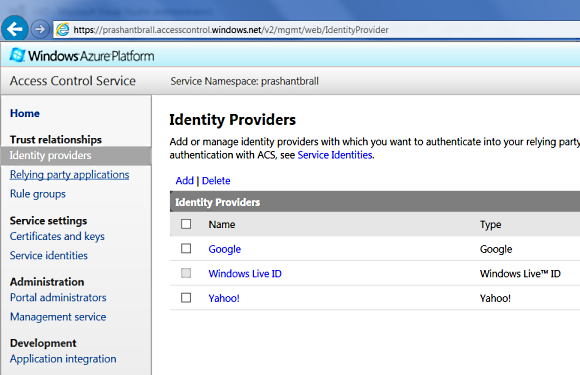
Once the namespace is created click on "Manage" so that we can configure and administrate Identity Providers, Relying party, Federation Metadata Endpoint etc.

Lets take a quick look into various options in Azure ACS and the first thing you will notice is that by default there are three major Identity Providers i.e. Microsoft, Google and Yahoo and if you like you can easily add Facebook or any WS-Federation based Identity Provider like your own Active Directory Federation Server.

Last October I posted about creating a simple website using ASP.NET MVC and deploying it into Azure. I am going to use the same website and secure the website using Windows Azure ACS. If you haven’t read that post I recommend you to have a look so that you would know how to publish your website to Windows Azure.
First thing we are going to do is to add our website as relying party, which means that this website relies on the Windows Azure ACS to manage and authenticate user and the website doesn’t do the identity management and authentication on its own.
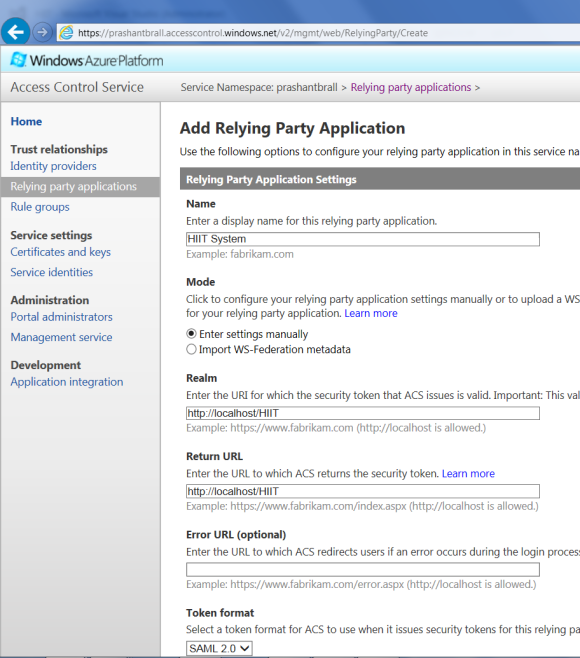
As you can see from the above screenshot I have just added my local IIS website as relying party, the realm and the return URL, this is just the configuration and the actual website will be created in Visual Studio later.
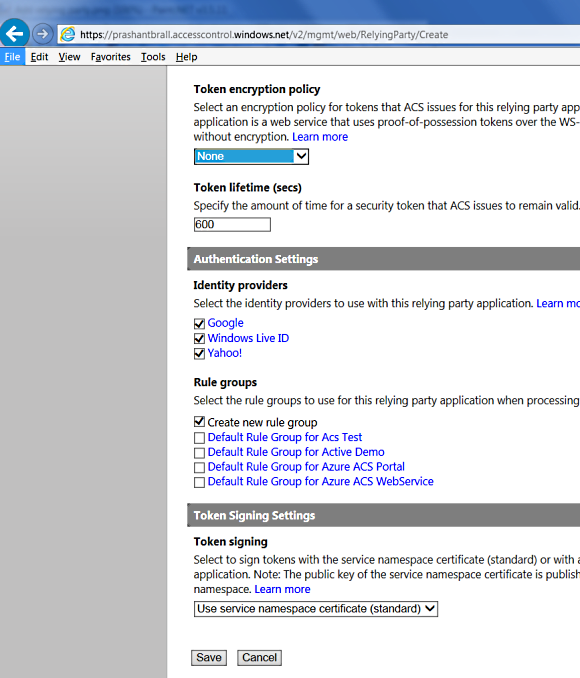
As you can see in above screenshot there is nothing special going on, we can see all the three providers for this relying party and we can see "Create new rule group" automatically selected. At this moment we will just click "Save" and will tackle the rule group next.
In the "rule group" we are going to specify how input claims in Windows Azure ACS are transformed into output claims so that our application can read these claims and work out additional task based on the user claims.
Generally all the incoming claims will map straight to out going claims and you don’t have to do anything special but I am just showing what can be done through configuration.
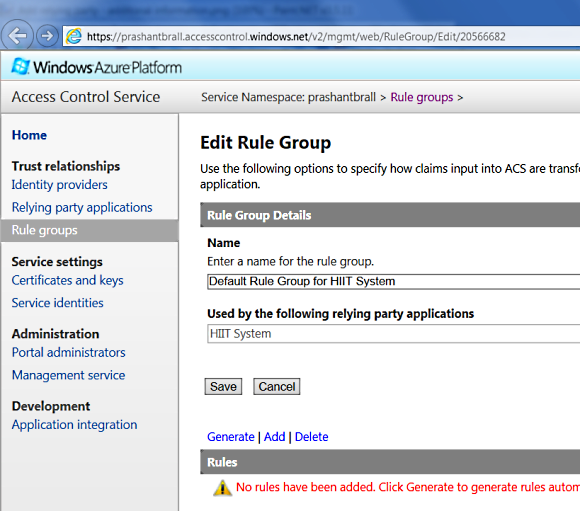
On this "Edit rule group" page we will click on "Generate" and it will populated some rules as shown below.
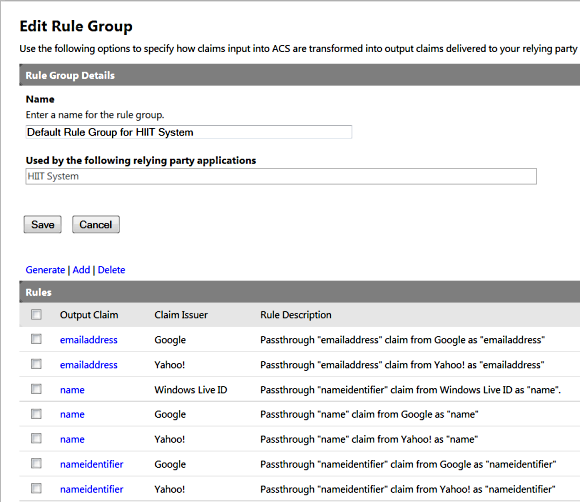
Now I am going to add one more rule and the reason behind this rule is that as part of Microsoft Live Id provider it only returns the nameidentifier claim value and doesn’t return a username due to security reasons. Where as providers like Google and Yahoo do provide the claim value name with user’s first name, last name as well as the email address. Anyways we need to fix this as
WIF manages behind the scenes orchestration of authentication and mapping claim principal to ASP.NET User principal.
If the claim name is blank and as part of the post authentication process when WIF tries to map the name to the User.Identity.Name we are going to get an exception and hence I am mapping the name identifier to the name claim value.
The above fix is done just for this end to end demonstration and in a real life application you have to take nameidentifier claim from Microsoft and use Windows Live Id APIs to get username and map it to the name claim programmatically.

and here is the final output with our custom rule for windows live id.

Before we jump into programming last thing we have to do is to go to the "Application Integration" page and get the WS-Federation Metadata endpoint as shown below. We will copy this URL as we will need this endpoint when we configure the identity management for our application.

Lots of configuration and looks a bit complicated but once you have grasp the concept it is quite straight forward. Lets start with File > New Project > Web Application > ASP.MVC and click on the "Change Authentication" button and a new dialog window will pop-up as shown below.
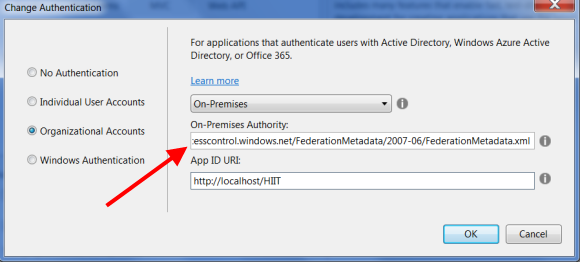
Select "Organizational Account", choose the On-Premises options from the drop down and provide the federation metadata endpoint we copied in the above step.
After this configuration you can see there are some additional assembly and bunch of configuration added to the web.config. The one which stands out is a whole new section for system.identityModel which has all the WS-Federated related information.
Also you can see there are two new HTTP module added to the config and they are WSFederationAuthenticationModule and SessionAuthenticationModule which are part of the System.IdentityModel.Services assembly and sits under the ASP.Net pipeline.
Next thing we will do is to set the website to run with local IIS server as shown below.

Lets browse to the website and you will see it will redirect to the federation login page and present you with which identity providers you wish to log in.

I am going to choose yahoo as my identity provider and it will take me to the yahoo log in page.

So I enter my credential and can see it is all good and it redirects back to my website but when the redirect completes we get this following error.
Server Error in ‘/HIIT’ Application.
ID3206: A SignInResponse message may only redirect within the current web application: ‘/HIIT’ is not allowed.
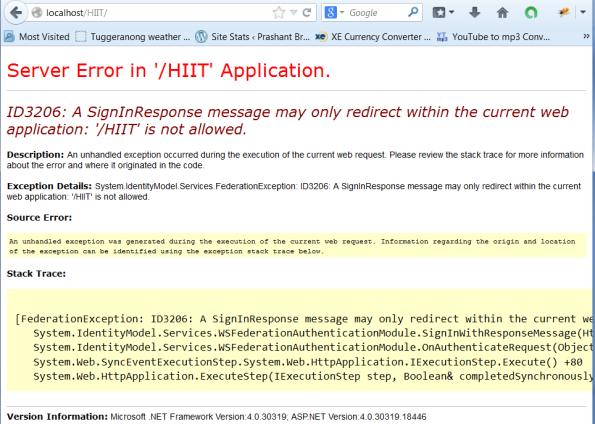
This is a well-known issue with WIF and it is a very easy fix, all we have to do is to append a ‘/’ to the returned URL and here is the code.
Global.asax.cs
public class MvcApplication : System.Web.HttpApplication
{
    protected void Application_Start()
    {
        AreaRegistration.RegisterAllAreas();
        FilterConfig.RegisterGlobalFilters(GlobalFilters.Filters);
        RouteConfig.RegisterRoutes(RouteTable.Routes);
        BundleConfig.RegisterBundles(BundleTable.Bundles);
    }

    private void Application_BeginRequest(object sender, EventArgs e)
    {
        if (string.Compare(Request.Path, Request.ApplicationPath,
            StringComparison.InvariantCultureIgnoreCase) == 0
            && !Request.Path.EndsWith("/"))
        {
            Response.Redirect(Request.Path + "/");
        }
    }
}
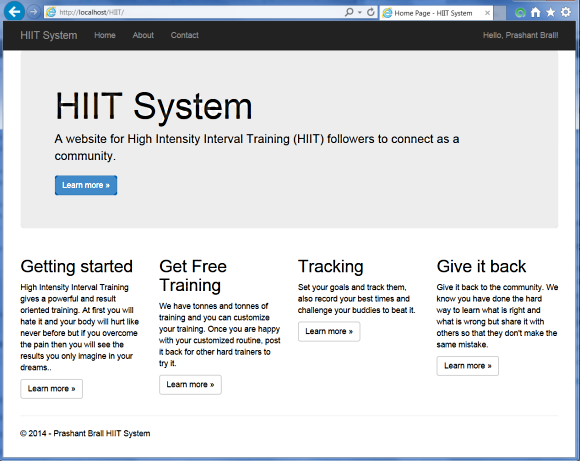
And this time now when I log in it takes me back to home page without any exceptions and you can see the username on the top right hand corner.
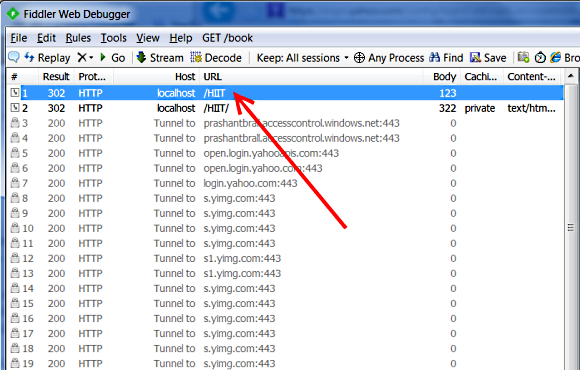
Lets look a bit deep into the whole WIF behind the scenes orchestration through fiddler. When I browse to the website the WSFederationAuthenticationModule kicks in and it does a 302 i.e. http redirect to the access control service as shown below.
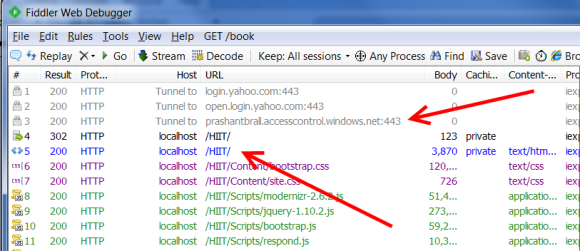
From here based on the identity provider I choose it takes me to their login page and if it is all good then it uses the return url to do another post authentication redirect.
Of course this is just the tip of the iceberg and there is a lot going on under the cover, specially with WIF and the ASP.NET pipeline.
If you are interested in playing around with this project the source code is available at http://1drv.ms/1lR5uqb. Unzip the file, run Visual Studio as Administrator and on project properties under Web click "Create Virtual Directory".
The live version of the demo is available at https://prashantbrall.azurewebsites.net/
Enjoy !!!

